Mastering Motion Blur: Tools, Techniques and Tips
- Gavin Whittaker
- Jun 11, 2023
- 13 min read

Updated: Aug 16, 2024
A Comprehenvive Guide to Motion Blur in Nuke

Welcome, digital dreamers and pixel pushers, to the world of motion blur in Nuke - the invisible hero of hyperrealistic visuals! Today, we're stepping into the fast lane to explore the whys, hows, and aha's of motion blur. But first, let's make sure we're all speaking the same language. What exactly is motion blur?
Motion blur is the streaky effect that you see when objects move quickly in a still frame. You see it every day - when you swing your phone, when you watch a car zoom past, or when you wave your hand in front of your eyes really fast. It's what our brains perceive as the blurring of an object in motion, and in the realm of visual effects, it's what sprinkles a generous dash of reality into our creations.
But we're not just here to slap on some haphazard blur and call it a day, oh no! We're about to go the extra mile, to match our motion blur perfectly with a plate or VFX shot. Why? Because in our quest for seamless integration with live-action footage, every little detail counts, and motion blur, my friends, can make or break the illusion of reality.
So strap in, as we're about to kick dust into the face of static visuals and charge headfirst into the captivating world of motion. It's going to be a whirlwind ride filled with dynamic elements and blurry edges, as we blur the lines between the real and the rendered. So, without further ado, let's hit the gas... 🌪️🎬
Steps:
1. Analyze the Plate
Start by carefully examining the live-action plate or VFX shot you're working with. Pay close attention to the motion blur present in the shot, its direction, and its intensity. This will give you a better understanding of the type of motion blur you need to match.
2. Identify the Shutter Speed and Angle
Determine the shutter speed and angle used during the filming of the plate. This information is crucial for accurately matching the motion blur in your VFX elements. If you don't have access to this information, you can estimate it by closely examining the plate and comparing it to reference images or videos with known shutter speeds and angles.
3. Generate or Match the Motion Vectors
To match the motion blur in your VFX elements, you'll need to generate accurate motion vectors that represent the movement of objects in your scene. You can either use motion vectors provided by your 3D department or generate them using tools like Nuke's VectorGenerator node or tracking/transform data if you are generating 2d motion yourself.
4. Apply Motion Blur
Once you have accurate motion vectors, use Nuke's VectorBlur node to apply motion blur to your elements. Adjust the settings in the VectorBlur node to match the shutter speed and angle identified earlier.
5. Fine-Tune with RotoPaint (Optional)
If you need more control over specific areas of your render or scan, consider using a combination of RotoPaint, Expression, and VectorBlur nodes to paint motion blur directly onto your VFX elements.
---------------------
*** update 16/08/24 *** Very cool and relevant video from Alex Villabon which explains much of the detail in this article
------------------------------
Matching the Blur:
Motion blur is primarily a result of the way cameras work. When a camera captures an image, it isn't an instant process. There's a little window of time – the exposure time or *shutter speed* – during which light is allowed to hit the sensor. If anything moves significantly during this time, it appears blurred in the final image. That's motion blur for you, in a nutshell.
Shutter speed is often coupled with another concept: the shutter angle. This term comes from the days of rotary shutters in film cameras, where the shutter was literally a rotating disc. The larger the angle, the longer the shutter is open, resulting in more motion blur.
Check out this video for more about calculating shutter speed:
Now, why do we care about matching motion blur in VFX? Well, motion blur can be different for each shot depending on the camera settings and motion within the scene. If we want our VFX elements to feel like they were part of the original footage, we need to ensure that the motion blur in our added elements matches the blur in the footage. If the blur is off, the effect can stick out like a sore thumb, disrupting the illusion we're working so hard to create.
This brings us to the importance of understanding the shutter speed and angle used in the filming process. With this information, we can recreate the exact amount and type of motion blur in our VFX elements, ensuring a seamless blend with the live-action footage.
In essence, by analyzing and matching the motion blur, we are paying homage to the reality that the camera captured. We're embracing the imperfections and transients of real-world physics, and in doing so, making our VFX creations feel more grounded and believable.
Here's a great post by Ben McEwan that talks about matching defocus and blur:

Generating the vectors or data:
Imagine you're cruising through a CGI landscape, your virtual camera snapping up still moments in time. In this high-speed realm, our camera operates with an infinitesimal shutter speed, making the simulation of motion blur a unique challenge.
So how do we overcome this hurdle? Here are three main strategies:
1. Baked Motion Blur: Although less flexible. This usually the prefered option; It's like capturing all the details of a complex model in a 3D software, including the subtleties of motion blur. Although this method is the most accurate, it's also the most compute-intensive, as it meticulously considers factors like sub-frame deformation and rotation. Its also the least flexible as any changes require complete re-rendering
2. Motion Vectors: Consider this your technical workaround. Here, we render the images without motion blur in the 3D software, but with the motion vectors being calculated and written out as an AOV. Then, in Nuke, we use the VectorBlur node to apply the motion blur. It's a bit less processing heavy, but it can sometimes feel like applying a motion filter to a still image. For rotation or deforming content, this method might not quite hit the mark, but for most purposes, it's a solid option.
Just like always, remember to be a "Precomp Pro" when dealing with AOV's, STMAPS and Vectors
3. Generating Motion Blur Data in Nuke: Alright, let's roll up our sleeves and dive into the fantastic world of creating motion blur in Nuke, where you're the maestro conducting a symphony of pixels and vectors.
First up, let's talk about the Transform node. It's like a loyal buddy who's always there to help you move stuff around. When you're shifting objects using this node, you can crank up the motion blur just by twisting the motionblur knob from 0 to 1. This knob is also hanging out in other nodes in the Transform menu, like the CornerPin and Tracker nodes. Keep in mind, though, that if you're partying with multiple transformation nodes, the last one in the conga line calls the shots on the motion blur.
Now, if you're looking for some extra firepower, Nuke also has a band of MotionBlur nodes: MotionBlur, MotionBlur2D, and MotionBlur3D. These guys are like the superheroes of the blur world, each with their own unique powers. They generate motion vectors and apply motion blur in their own special ways, perfect for different scenarios.
The following nodes under the Transform menu have their own controls for adding motion blur to transformations:
• Transform
• TransformMasked
• Card (3D)
• CornerPin2D
• Reconcile3D
• Tracker
• Stabilize2D
Sometimes, though, the regular motion blur might not cut the mustard. You might want to jazz things up a bit, add some flair, or even craft a one-of-a-kind blur effect. In those cases, Nuke lets you go full Picasso and paint the motion blur in yourself.
Don't forget about the shutter offset settings, either. They're like the bouncers at a club, controlling when the shutter gate opens and closes relative to the current frame. These guys are hanging out in various transformation nodes or the ScanlineRender node, and can make a big difference to the final result.
Remember, though, that motion blur can be a resource hog. To stop your Nuke script from getting bogged down, you might want to consider precomping or using the $gui expression to give the motion blur node a breather.
The TimeBlur node in Nuke is yet another trusty tool in your VFX artist's toolbox. This little guy is a champ at simulating the smearing effect we see when objects zip around while the shutter is open. It works by sampling its input multiple times over the course of the shutter frames, starting from the current frame plus an offset.
This handy node simulates the smearing effect you'd see in a high-speed shot. It samples its input over the defined shutter frames, and starts at your current frame plus an offset. TimeBlur is often used with garbage masks that are tracked to a speedy feature. By averaging the incoming mask image over the shutter period, it helps your VFX match the original motion blur.
Tip: Read more about motion blur nodes in Nuke at Foundry here --> https://learn.foundry.com/nuke/content/comp_environment/transforming_elements/adding_motion_blur.html
But wait, there's a catch!
Using TimeBlur on all the upstream nodes in your composition can be like deciding to run a marathon on a whim - not only unnecessary but also very time-consuming. In these cases, you can use the NoTimeBlur node to limit the number of nodes to which you're applying TimeBlur. Just pop the NoTimeBlur node in your node tree above the TimeBlur and any nodes you want the TimeBlur node to process, and you're good to go
When you're playing with the timing of scans in Nuke, it can throw a spanner in the works for motion blur. It's like adjusting the speed of a vinyl record—it doesn't change the length of the song (or the exposure time of each frame, in our case), just the speed it plays at. This can throw off the balance of your motion blur. But don't worry, you can fix this by adding a bit more blur to each frame.
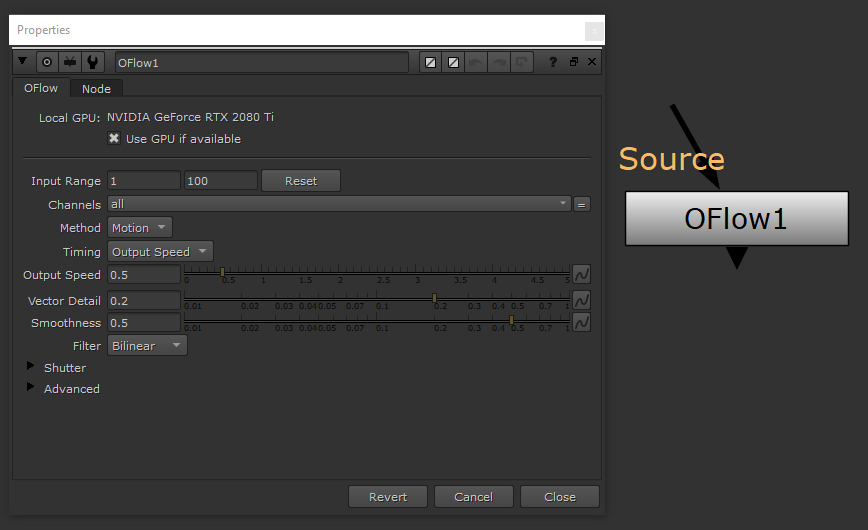
Don't forget about the VectorGenerator, OFlow, and Kronos nodes. These guys are like the Swiss army knives of motion blur. VectorGenerator is great for creating motion vectors, while OFlow and Kronos are the go-to for advanced retiming operations. Kronos even has a shutter setting to tweak motion blur, and the Transform node has shutter offset settings to control the timing of blur effects.
In a nutshell, getting to grips with all the ways you can generate motion blur data is a key step in making realistic blur effects in Nuke. Pick the right methods, wield Nuke's tools effectively, and you'll be adding a whole new layer of realism to your animations. It's like turning up the dial on your radio from "pretty cool" to "mind-blowingly awesome!"
Offsets
In Nuke, the shutter offset determines when the "shutter" of your virtual camera opens and closes relative to the current frame. There are four options you can choose from:

Centered: This is like saying, "Start your engines! And… Go!" right when the cars are zooming past the halfway mark. If you set the shutter value to 1 and your current frame is 30, the shutter stays open from frame 29.5 to 30.5.
Start: This is like snapping the photo right when the race begins. If you set the shutter value to 1 and your current frame is 30, the shutter stays open from frame 30 to 31.
End: This is like catching the dramatic finish, with the cars crossing the finish line. If you set the shutter value to 1 and your current frame is 30, the shutter stays open from frame 29 to 30.
Custom: This is like picking your own perfect moment to capture the action. You can open the shutter at the time you specify. In the field next to the dropdown menu, you enter a value (in frames) you want to add to the current frame. To open the shutter before the current frame, enter a negative value. For example, a value of -0.5 would open the shutter half a frame before the current frame.
In the real world, you'd use these options depending on the specific motion or effect you're trying to create. For instance, if you're working on a fast-paced action scene, you might want to experiment with different shutter offsets to see which gives the most dynamic result. On the flip side, if you're working on a slow, serene scene, you might want a different offset to capture that mood.
So, like a pro racing photographer, you've got to adjust your settings based on the speed and movement of the scene you're capturing. And remember, there's no one-size-fits-all solution - every shot is unique!
Applying the blur (we have a buffet of options):

VectorBlur Node: VectorBlur Uses motion vectors, either supplied or computed within NukeX, to simulate object motion blur. This node relies on accurate vector information for best results.

TimeBlur Node: The TimeBlur node creates motion blur by averaging frames over a specific duration. This approach generates a streaking effect that mimics motion blur by blending frames before and after the current frame.

Kronos Node (NukeX) Kronos is a powerful node for adding motion blur to CGI FX elements like fire, smoke, or debris. It offers advanced retiming capabilities and produces similar results to the MotionBlur node, but it may suffer from ghosting issues.

MotionBlur Node (NukeX) Exclusive to NukeX and Nuke Studio, the MotionBlur node is a user-friendly tool that adds motion blur using the same technology as Kronos. It utilizes pre-calculated motion vectors for efficiency, offers fine controls, and can use separate foreground and background vectors.

Oflow Node Oflow is another node for adding motion blur to CGI FX elements. While it can produce pleasing results, it may introduce artifacts and shares the ghosting issue with Kronos and MotionBlur nodes.
MotionBlur2D Node MotionBlur2D node in Nuke is specifically designed to work with 2D plates. It applies motion blur based on transformational changes across the x and y-axis.

MotionBlur3D Node MotionBlur3D node is designed for 3D scenes and objects, creating motion blur based on objects' movements and rotations in 3D space.

Transform Node + Shutter Offset Transform node with the Shutter Offset function mimics the effects of a physical camera shutter, creating a more realistic motion blur. When concatenation is broken, STMap can be used to retain motion blur.

Painting Motion Blur Painting motion blur in Nuke provides fine control over specific areas of your render. By using RotoPaint, Expression, and VectorBlur nodes in combination, you can manually add motion blur where it's needed most. (for mor on this techniqe check out this post by Kenn Hedin Kalvik (also image credit below:)

For some more info and a really great article comparing motion blur techniques for CGI elements with AOV's check out this post by Huey Yeng --> https://taukeke.com/2018/04/kronos-motionblur-oflow-or-vectorblur/

Image credit and Source: taukeke.com
Method Comparison:
Method | Pros | Cons | Best For | Performance / Cost |
Vector Blur | Easy to use; applies blur based on object movement | Requires accurate motion vector data; may encounter issues without a NoTimeBlur node in the tree above | When accurate motion vectors are available
| Moderate; depends on the accuracy of motion vector data |
Painting Motion Blur | Offers precise control over specific areas; allows for artistic discretion | When you need to apply blur to specific parts of the image | High; manual process can be time-intensive | |
Kronos Node | Advanced retiming capabilities; good for CGI FX elements | Can introduce ghosting; requires accurate motion vector data and a NoTimeBlur node in the tree above | When you need to add blur to CGI FX elements and perform retiming | High; advanced features may require more computational power |
MotionBlur Node | Produces similar results as Kronos; simpler to use | Lacks advanced retiming; may introduce ghosting; requires a NoTimeBlur node in the tree above | When you need to add blur to CGI FX elements and perform retiming | Moderate; less complex than Kronos but may still require significant resources |
Oflow Node | Can be used with CGI FX elements; offers more flexibility than some other methods | May introduce artifacts and ghosting; requires a NoTimeBlur node in the tree above | When you need to add blur to CGI FX elements and have high tolerance for artifacts | High; flexibility can come at the cost of performance |
Time Blur Node | Averages frames over a duration to create blur; does not require motion vector data | Might blur stationary parts of the image; less control over direction of blur; requires a NoTimeBlur node in the tree above | When you don't have motion vector data and need to add motion blur quickly | Low; simpler method but with less control |
Transform Node + STMAP | Offers the ability to warp an image based on UV coordinates from another image and adjust shutter offset to add motion blur | Requires creation of a STMap, can be computationally expensive; when concatenation is broken, STMAP can help but adds complexity | When you have changes in the image that can be expressed as 2D UV changes, such as planar tracking data, or when you need to add motion blur using shutter offset in transform nodes | High (initially to create vectors and ST MAP); complex method with high computational cost at first, Low (once STMAP is available) |
Extra tip; Add Micro Motion Blur (Credit to Cyril Conforti)
For an extra touch of realism, consider adding micro motion blur to your scene. This technique simulates the subtle blurring caused by tiny movements or vibrations that are too small to be captured by traditional motion blur methods.
Thanks!!
We've embarked on a comprehensive journey through various tools and techniques, shining a light on the numerous ways to create motion blur effects.
From the power of the TimeBlur node, our trusty tool for simulating the smearing effect, to the versatile VectorGenerator, OFlow, and Kronos nodes, our Swiss army knives of motion blur, we've explored the ins and outs of these essential tools. We've also delved into the concept of shutter offsets and the variety of ways they can influence the result of our motion blur, truly underlining the customizable nature of Nuke's toolset.
I have tried to bring together information on this topic from a number or souces and would like to take a second to offer my thanks and appreciation to all of the super talented and knowledgeable artists who also took their time to put down their thoughts, tips and tricks so that we can all collectively grow as a community and push this amazing artform further together! Be sure to check out their posts, blogs, channels and say show your appreciation.
It's clear that no single approach fits all scenarios. Just as every shot is unique, so must our application of motion blur be.
The key is to understand the strengths and weaknesses of each tool, and to adapt and apply them according to the needs of our projects.
As we end our exploration of motion blur in Nuke, I want to extend a heartfelt thank you for accompanying me on this journey. I hope that you've found these insights valuable and that they empower you to bring a new layer of realism to your animations. Remember, the world of visual effects is a vast one, and every tool you master is another step towards creating incredible, compelling, and immersive experiences.
Thank you for spending your time reading this post. Your continued interest and support fuel the creation of content like this. I will try to continue this fascinating journey together, exploring and mastering the tools and techniques that make our imaginations come alive on the screen.
Stay tuned for more...


Comments